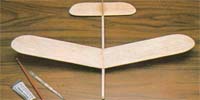
The first tutorial is for a simple chuck glider; this can be a good introduction to beginners as gives experience in working in one of the primary woods used in modeling, Balsa wood. It also teaches some basic techniques in trimming.
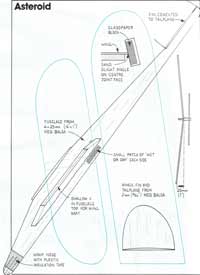
Click on the image of the plan to open a new window or tab with the plan at full size.
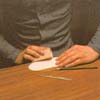
Start by printing a copy of the plan from the website on to a sheet of A4 then trace the design onto greaseproof paper .
Turn the paper over and position on the wood noting the grain direction shown on the plan and redraw over the lines from the back, this will transfer them onto the wood alternatively cut round the outlines of the components and use them as templates.
Turn the paper over and position on the wood and redraw over the lines from the back, this will transfer them onto the wood.
Cut them out using a straight edge such as a metal ruler for the straight edges.

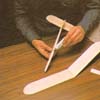
Hold the wing panels on the edge of a building board and sand the wing with glass paper, trying to get the edge as close to the line as possible, repeat with the tailplane. Finally round the leading and trailing edges of the wings and tailplane.
Hold the wing on the edge of the building board and carefully sand the wing root angle as shown on the plan.
Pre-Cement the joint faces of the wing halves; bring together, then separate and leave to dry.

Cement the joint faces of the wing and join, propping the tips up to 25mm (1inch) as shown.
Sand the fuselage rounding the edges cement the tail plane in place.
Add the fin, Pre-cementing the joints.
Shape the shallow V for the wing seat and pre-cement the wing and fuselage then cement the wing in place, ensuring the wing, tail and rudder all sit true and square.
Use a small drill in the fingers to drill out the nose and push in strips of solder or headless nails or pins until the model balances when held at the wing tips.
Apply two coats of clear dope, sanding sealer or banana oil and rub down with very fine paper.
Cement two small pieces of wet and dry paper to the fuselage as shown to assist launching.
Polish model with a wax polish.

Check how it glides by testing in tall grass to avoid damage to the plane.
Add pins to the nose to achieve a smooth glide.
Launch hard upward at 60 degrees with model banked 45 degrees to right.
Finally adjust flight by breathing on the fin and holding a warp for a few seconds or modifying the nose weight as necessary.

